How to Delegate Your AVAX on Avalanche — Staking Guide
Learn how to delegate AVAX on Avalanche using Core Wallet or Ledger. This guide covers delegation requirements, P-Chain transfers, validator selection, rewards, fees, and common mistakes.
What Is AVAX Delegation?
AVAX delegation is the process of staking AVAX tokens with a validator on the Avalanche network to earn staking rewards without running a validator node. Delegators retain ownership of their AVAX, but the tokens are locked for the selected staking period.
Validators use delegated AVAX to participate in consensus and secure the network. Delegators earn rewards based on the amount staked, the staking duration, and validator performance. You need a minimum of 25 AVAX to delegate. Staking duration range from 2 weeks to 1 year, and AVAX remains locked for the full duration.
Why Delegate AVAX to xLabs?
xLabs is an Avalanche validator focused on reliability, security, and long-term network participation. By delegating your AVAX to xLabs, you support an actively maintained validator while earning staking rewards with consistent performance.
How to Delegate AVAX to the xLabs Validator
You can delegate AVAX to xLabs using either Core Wallet or a Ledger device by following the standard delegation process and selecting the xLabs validator during the validator selection step.
Before staking: Ensure your AVAX is on the P-Chain.
Transfer AVAX to the P-Chain
Avalanche operates using three primary chains:
- X-Chain for cross-chain transfers, asset exchange, and creating new tokens.
- C-Chain for smart contracts and decentralized applications.
- P-Chain handles staking and validators.
If you hold AVAX on C-Chain, you have to perform a Cross-chain Transfer within Core Wallet interface before staking.
Staking AVAX with xLabs
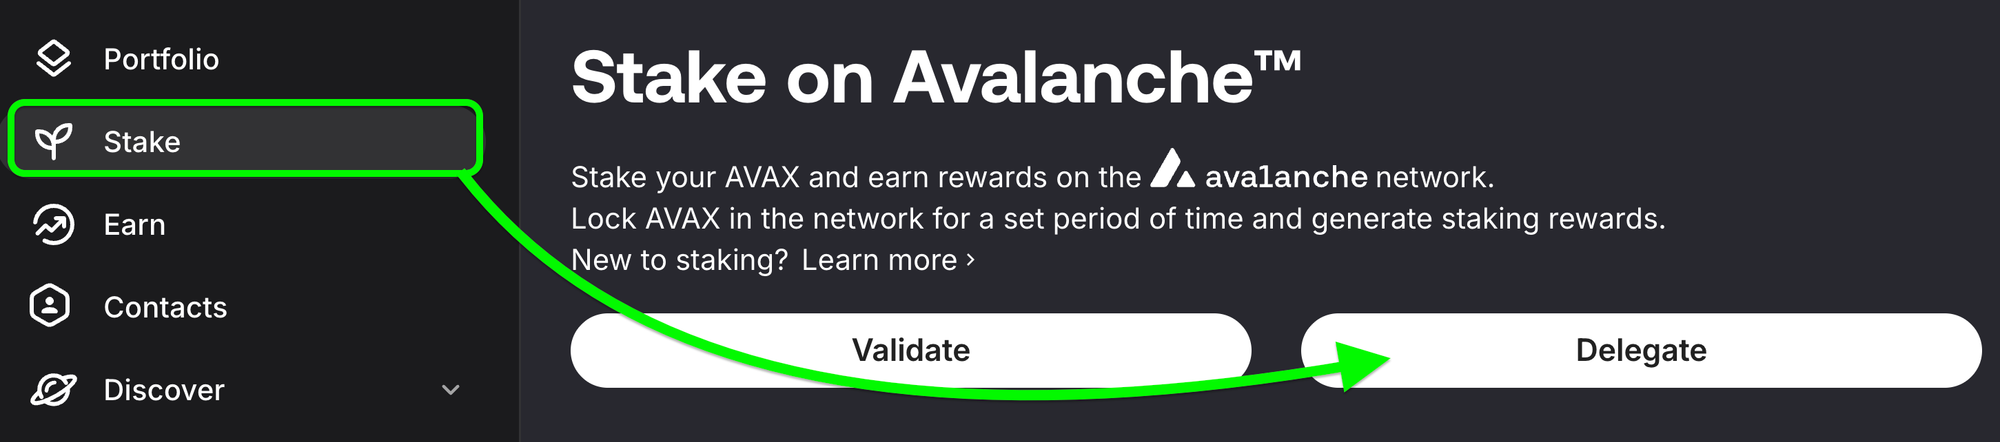
In Core Wallet, select the Stake section, and click Delegate.
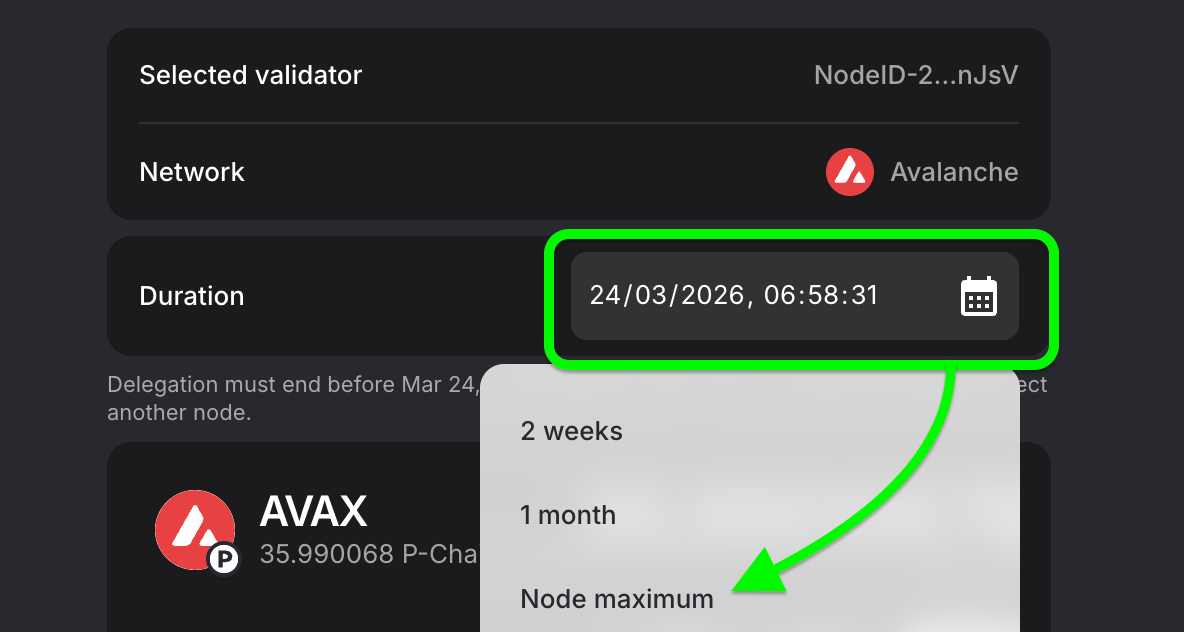
Copy xLabs NodeID: NodeID-2WC7frnyTF3JAaSMFxBtMqu39ZdJ7nJsV paste it into the Search NodeID field and press the View button.

- Enter the amount of AVAX to delegate and set Stake Duration to Node Max.
4. Reward Address: Make sure the reward address is set to the connected wallet.
5. Summary: Review & Submit Delegation. Once confirmed, your AVAX is locked and will earn rewards until the staking period ends.
Delegating AVAX on Avalanche is a simple and effective way to earn staking rewards while supporting network security. Selecting xLabs ensures your AVAX is staked with a validator focused on uptime, security, and long-term Avalanche participation.
Institutional-Grade Validator Services
Looking for institutional staking or a white-label validator solution? Get in touch to build a setup tailored to your needs.